How to authenticate to an Azure Blob Storage Container
Prerequisites
To connect Azure with Rhombus AI, you need to generate a connection string with shared access signature (SAS) token.
Step 1. Create a Storage Account and Container
Before generating a connection string, ensure you have a storage account and a blob container created in Azure.
-
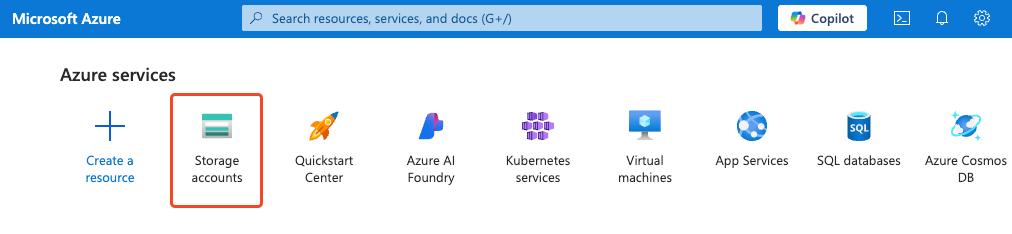
Navigate to the user portal and Storage Account.
-
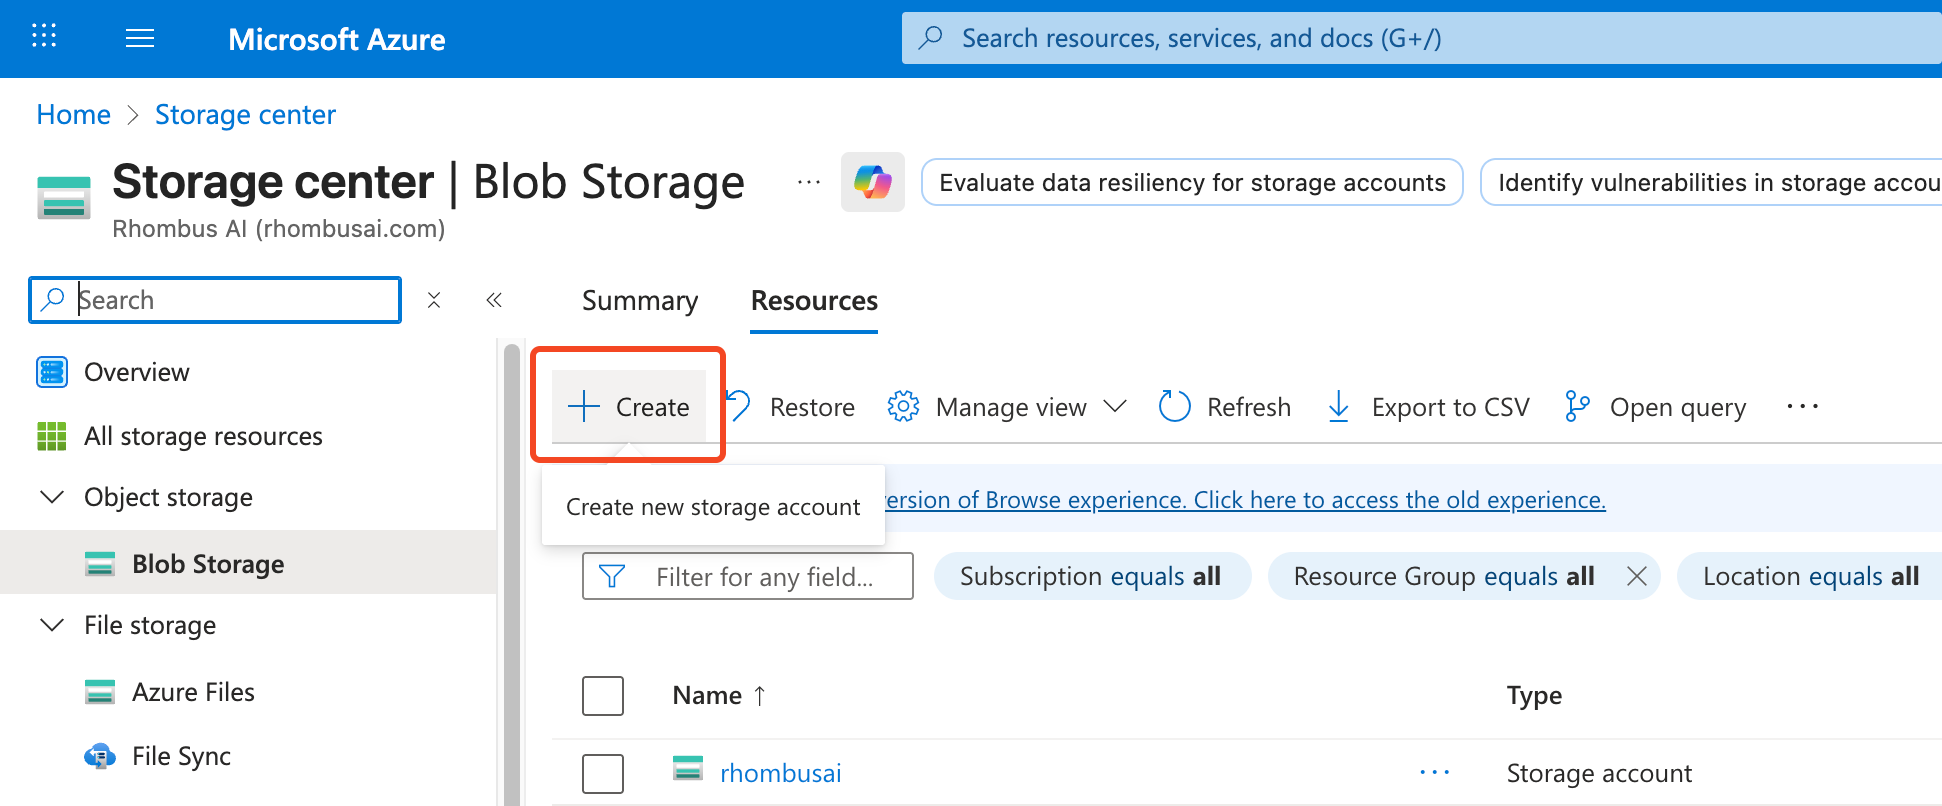
Create a storage account if you don't have one already.
-
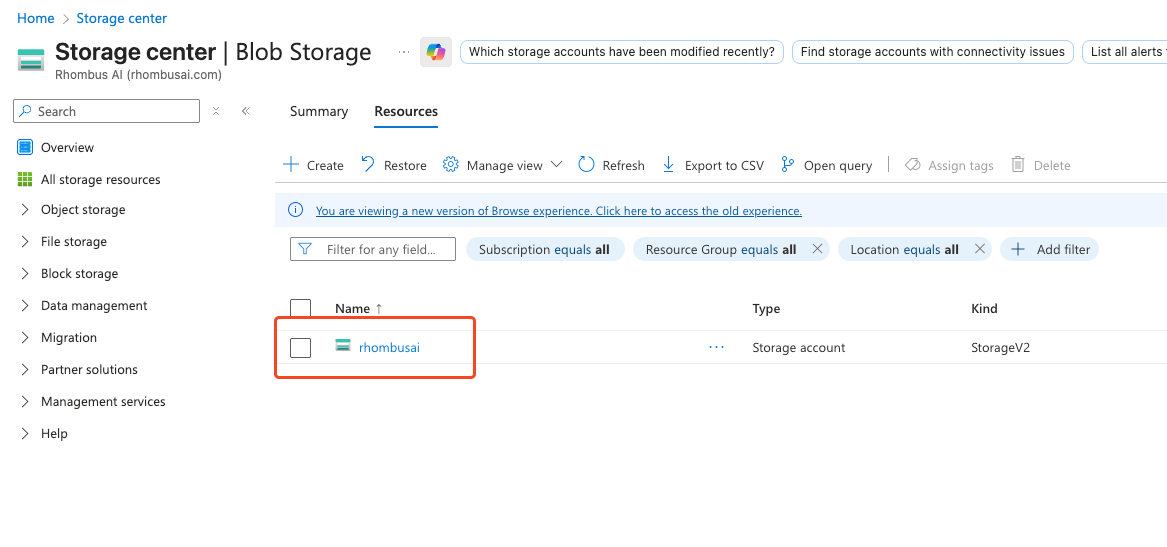
Select the desired storage account.
-
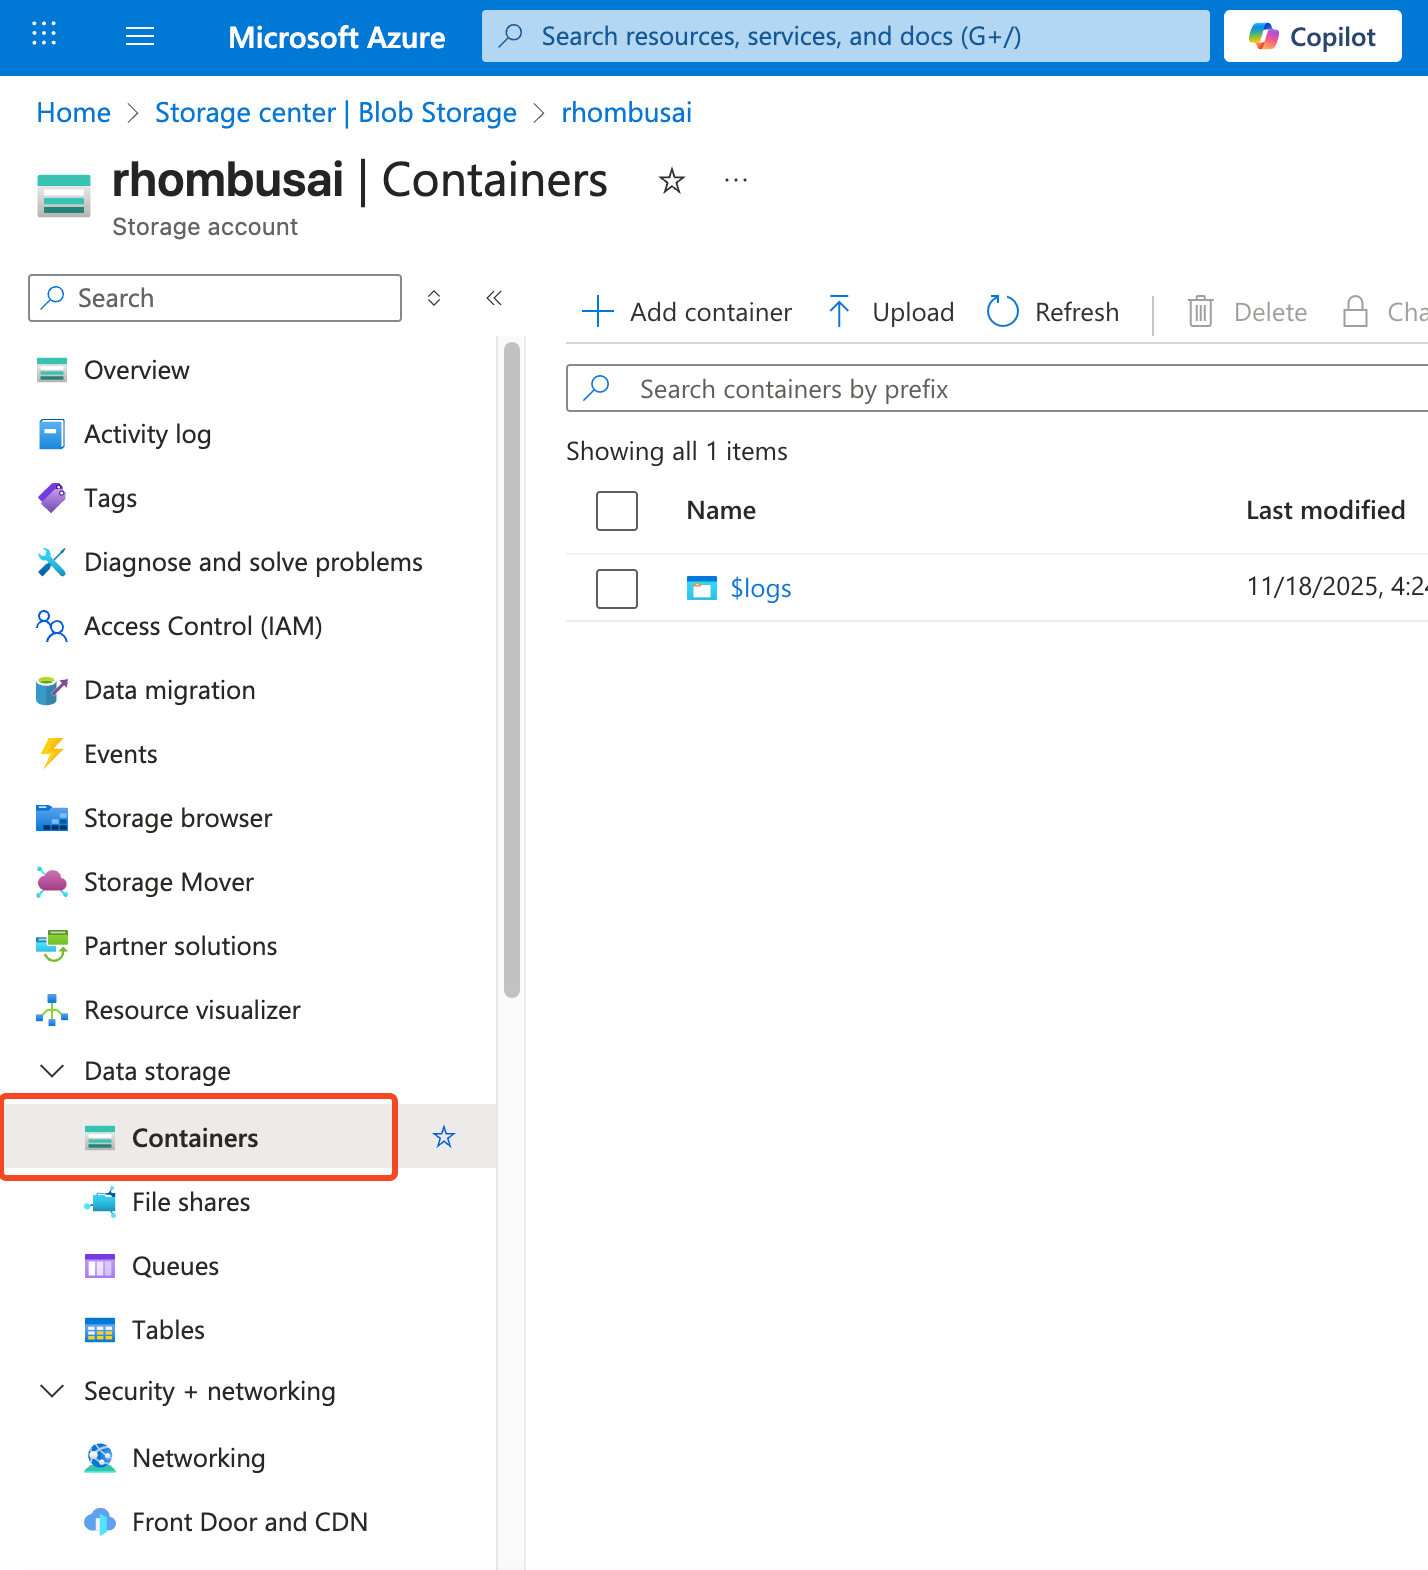
Go to Containers under the Data storage section in the left sidebar.
-
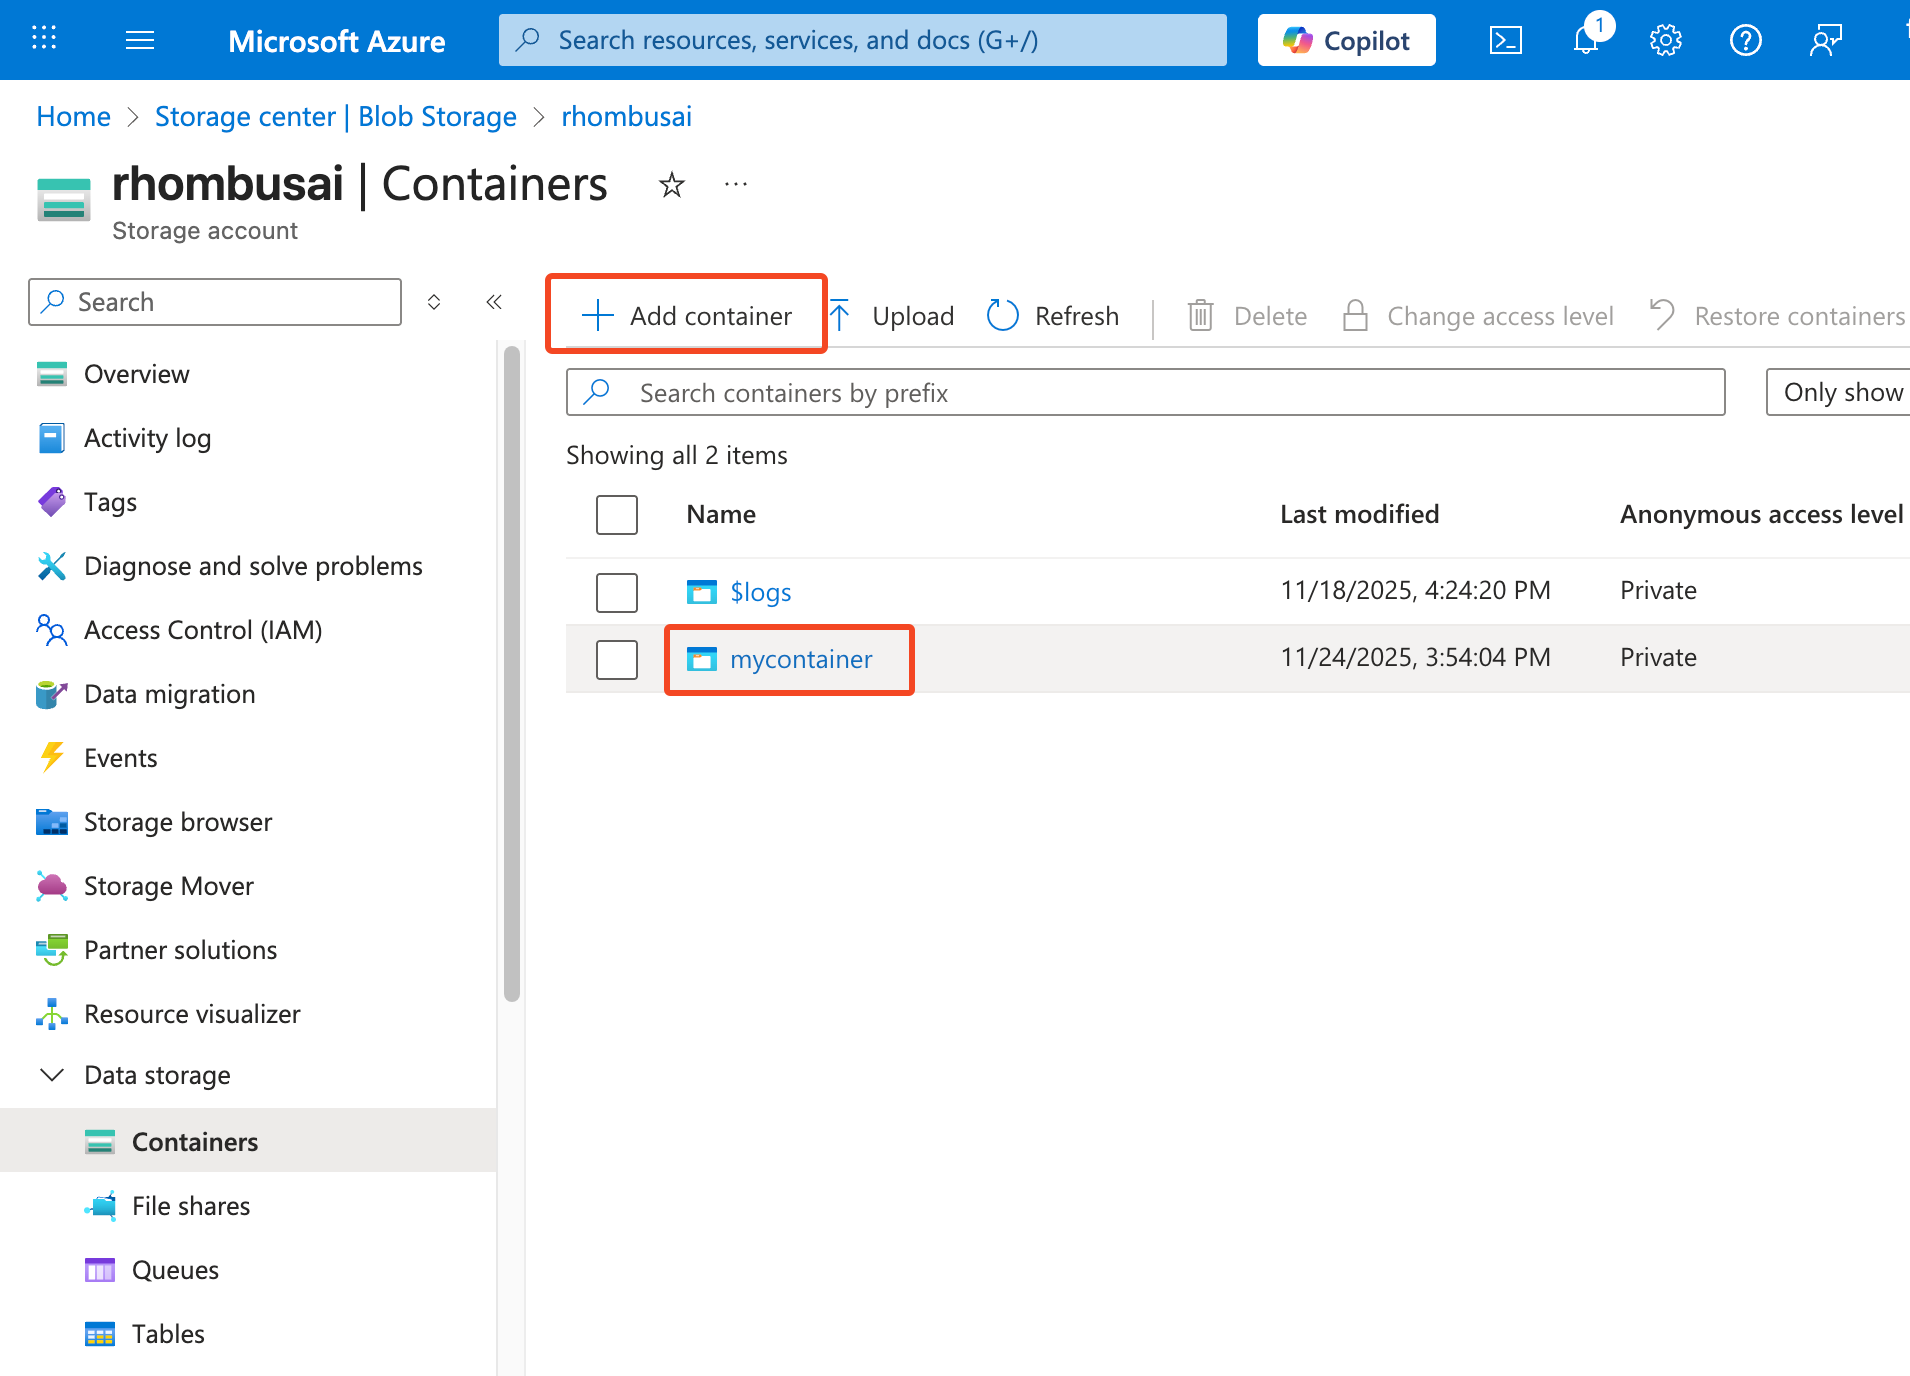
Create a new container by clicking on the Add container button at the top, and get the Container Name.
Step 2. Navigate to Shared access signature
-
Back to Storage Account.
-
Select the desired storage account.
-
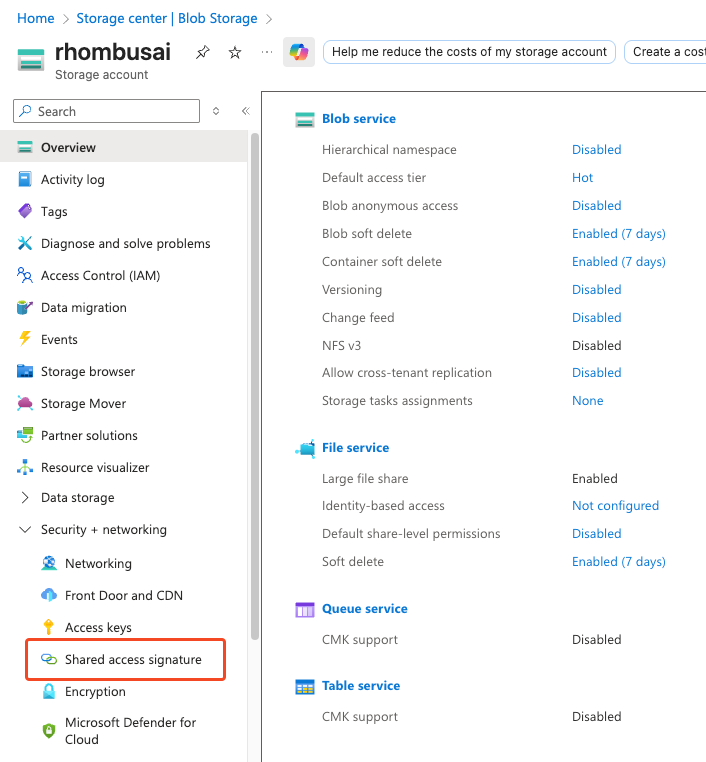
Click Shared access signature in the left sidebar.
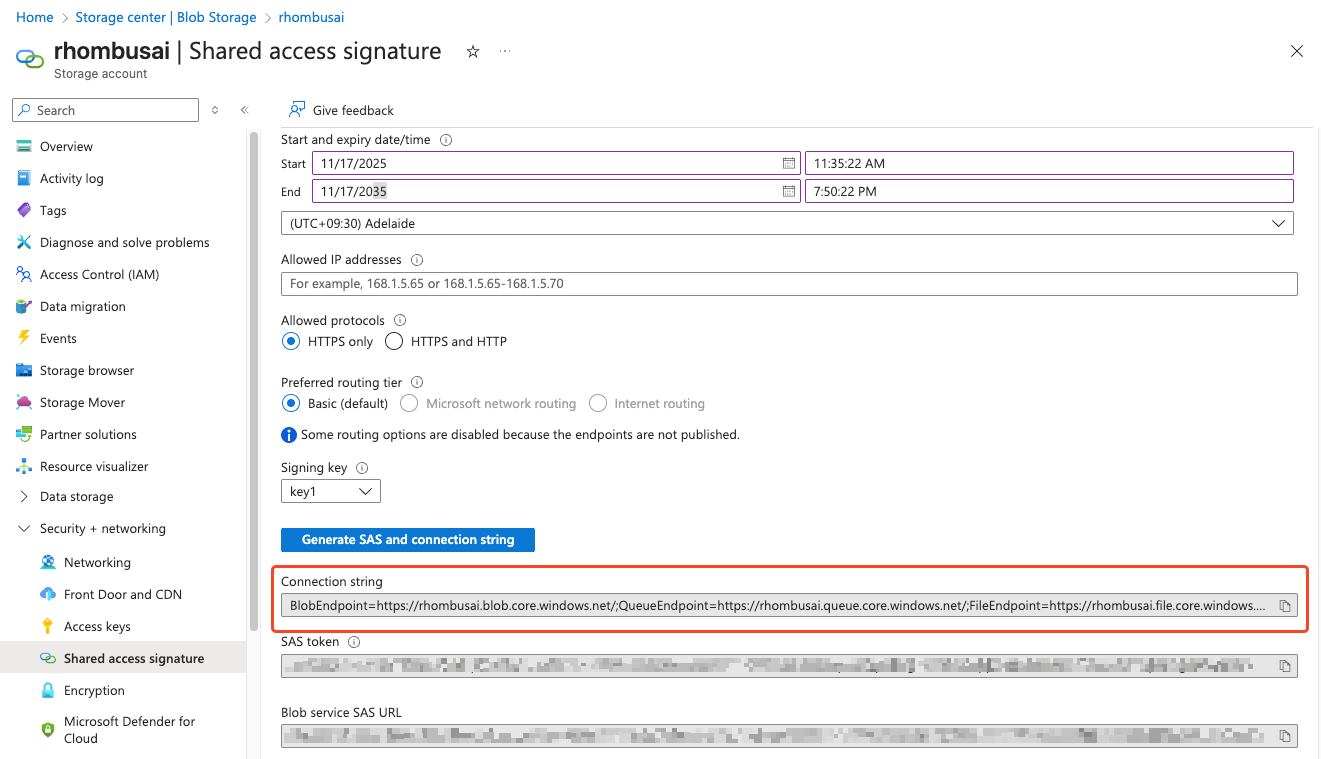
Step 3. Generate SAS and Connection String
-
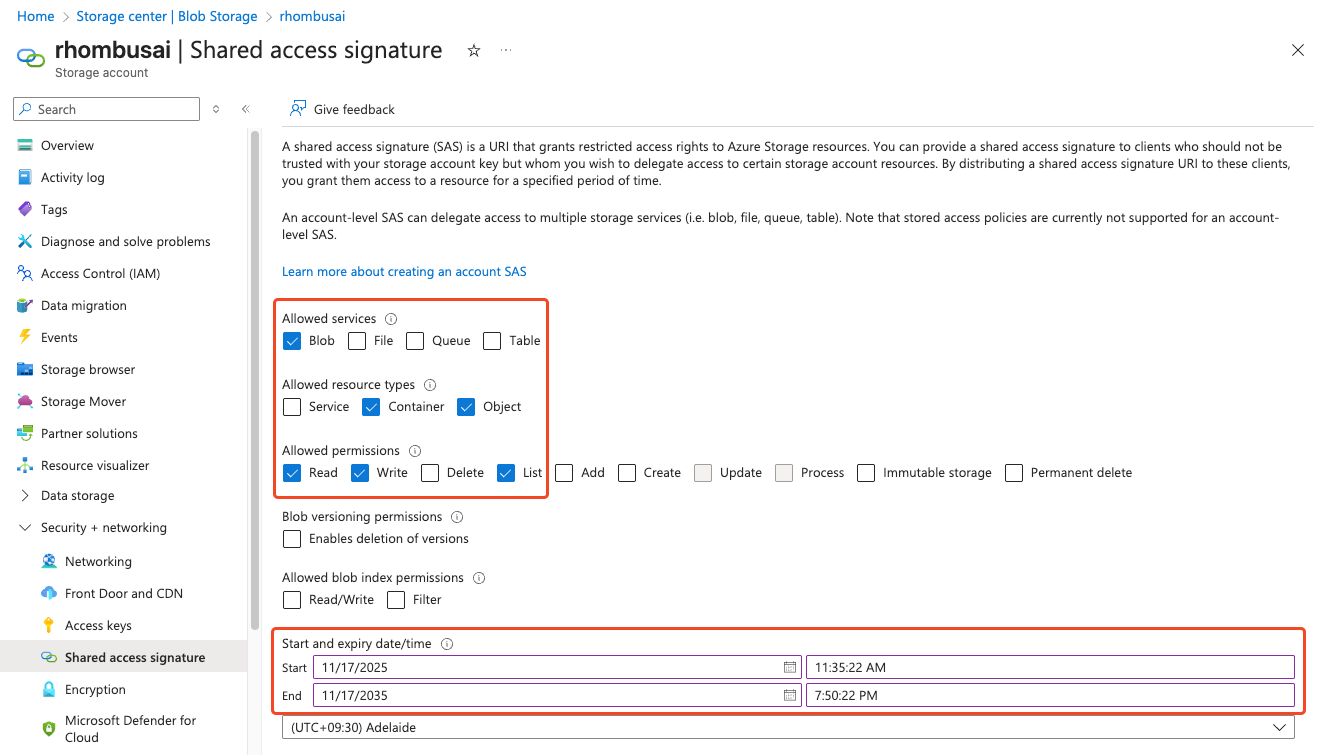
Select Blob from the Allowed services options.
-
Select Container and Object from the Allowed resource types options.
-
Select Read, Write, and List from the Allowed permissions options.
Note: The Write permission is optional, but it's essential if you need to save files to the storage account.
-
Select the expired date.
-
Click Generate SAS and connection string. The Azure portal will generate both a SAS token and a connection string. Copy the connection string for use with Rhombus AI.
Note: The connection string format includes the blob endpoint and the SharedAccessSignature parameter:
BlobEndpoint=https://<storage_account>.blob.core.windows.net;
SharedAccessSignature=<sas_token>